T h e T u t o r i a l
Pretzangles built entirely inside the Pretzangle Program
For those who
strictly care to build these in the Pretzangles Program, in all honesty, it
will be a little more difficult to begin this way but in the long run, the
results will be much easier to duplicate, and really quite amazing. The Core Seed Hexagon is already built into
your PRZ files but if you would care to see how it’s built. Here is one method, though perhaps there are
other easier methods, to achieve the same result.
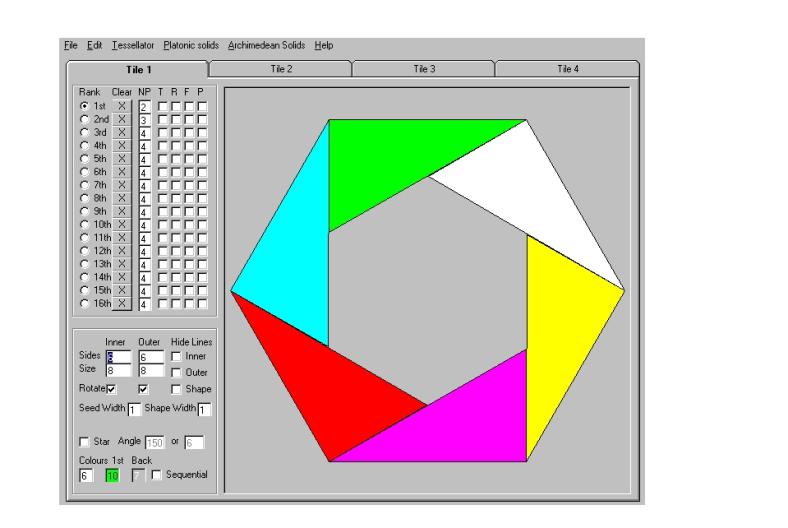
Start with the
opening Pretzangle screen and choose a 6 sided figure, inner and outer, and the
screen should look like this. (Note that for the 1st Rank the NP
block has a 2, because we will be creating lines (2 Points). When we use the 2nd Rank the NP
block has a 3 for the 3 points of a triangle.)
Then using the 1st
rank click once on the top left corner and then click once on the bottom left
corner and lines automatically appear to fill up the polygon. This outline is just a series of
guidelines and will be removed shortly.
It should look like this:
A screen showing the creation of guidelines
Now, the easy part of
all this, and the amazing simplicity of Steve’s program: using the second rank, start at the same top
left corner and click once[1]. Then
tracing the outline of your triangle click once [2] as shown below, and finally
completing the triangle click again[3]:
(All colour triangles should then appear). First I’ll show you steps 1, 2, & 3: (Reminder: Clear the guide lines in the 1st
Rank after you build your triangles)
Steps 1, 2, and 3 in creating your first triangle
Core Seed Hexagon (Horizontal)
Alternative Method of Creating the Same Image:
This is a faster and simpler method of creating the same image above, but it isn’t quite as precise, and you sort of have to drag the triangle into existence. It will however, offer you another way to create your first Seed, and there are no construction lines to worry about.
Start with a blank
screen and the Hexagon again, only this time set the 1st NP Rank to
3.
Click the top left corner [1], and then the top right corner [2],
and then click somewhere in the middle of the Hexagon [3]. Then just click on the third point and drag
it around until your triangles come out correct. Here is another drawing
showing this type of construction.
Then here is what happens when you click [3] above, and then click on it and drag it, to create the configuration you want:
Click to see the next section of the tutorial
Click to return to the home page