T h e T u t o r i a l
Using the Tessellator:
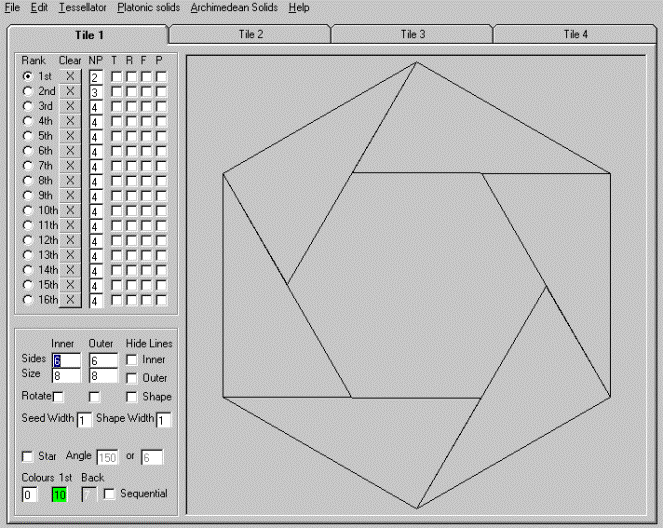
Because of the next transition to the Tessellator, we’ll now switch the colour back to ‘0’ the
result looks like this:
This is the Core Seed for a regular Hexagon, and you can now go to the File Menu and SAVE it under the PRZ file of your choice. (Note: this drawing was done entirely inside the Program with no pencil or paper necessary.)
If you're starting this part of the tutorial from a fresh start, open the program and
retrieve the PRZ file, which you saved for the Core Seed shown above. Try to recall exactly how you built
this. Then go into the Edit part of the
menu and select “Clear all Ranks in the Tile”.
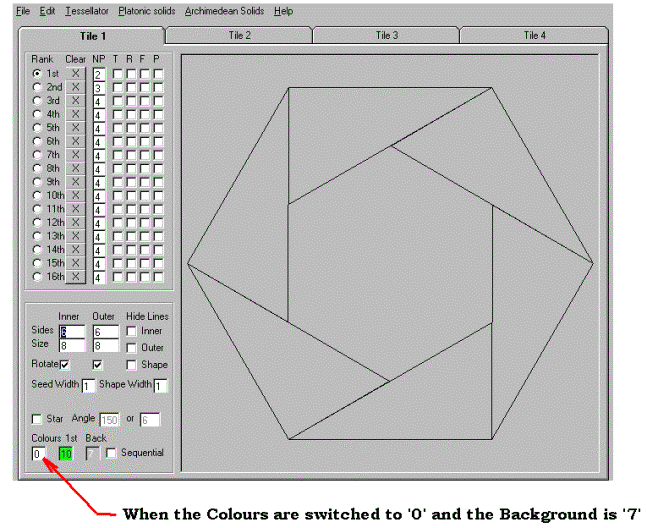
Once all ranks are clear, then simply eliminate the ‘Checks’ in the
rotate boxes. This will show you a
hexagon with it’s left and right sides shown vertically. Proceed to build a new PRZ file exactly as
you did with the first Core Hexagon Seed until the result looks like this
(Don’t forget to CLEAR the guide lines in the 1st Rank):
Core Seed Hexagon (Vertical)
Before you do anything else Save this File, as a new PRZ file.
Now click the Tessellator Button in the menu. The Tessellator window should appear. Choose the size you want, and then press the Shift key and the left key of the mouse at the same time. You should see a copy of the Core Seed (Hexagon) appear on the screen. Here is where Steve’s Program becomes simply incredible, and illustrates the advantage of building things within the program! Just continue to copy the file again and again moving your next copy around to be juxtaposed to the prior copy, until you get something that looks like this:
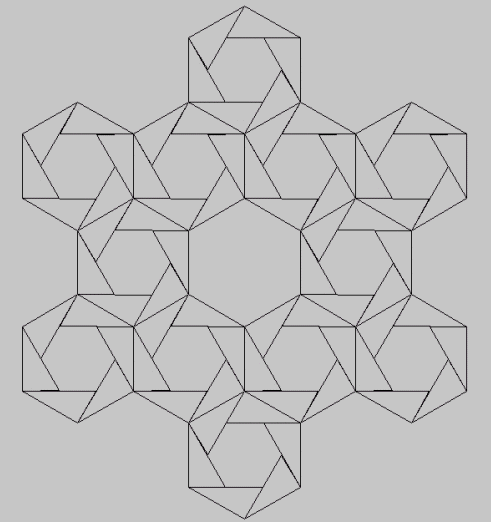
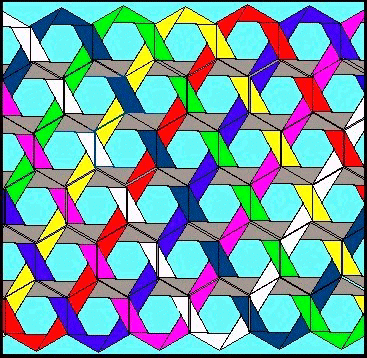
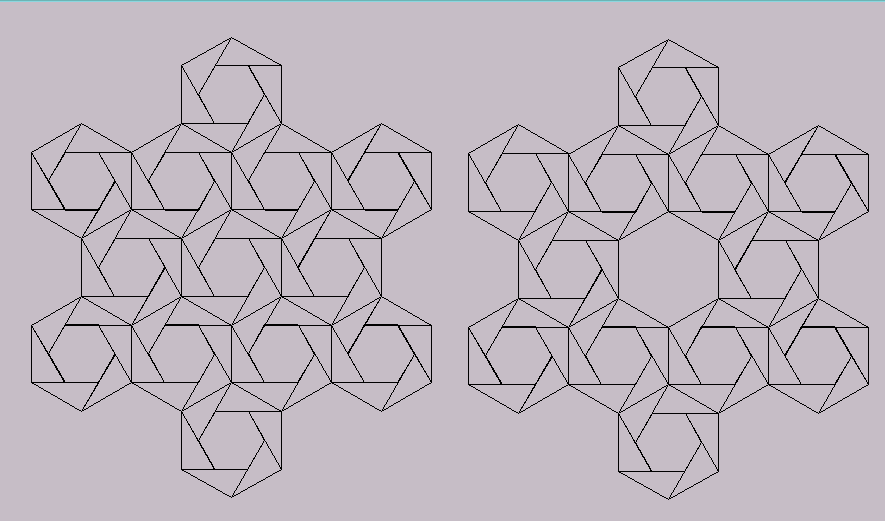
The Wreath
You will understand why I deliberately left the center copy out, in a moment. But first take a long look at what you have drawn. Can you see the weave? It may take a moment. If necessary, take a break, relax your eyes and come back and look at it again.
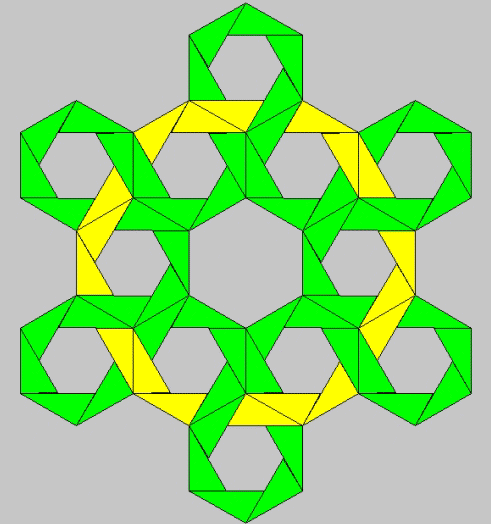
Here is what it looks like as a Pretzangle:
If you take a close look at this, you can imagine my surprise, when surfing the web last year, I came across the drawing shown below, built in Steve Abbott’s ‘3D Knot’s Software’.
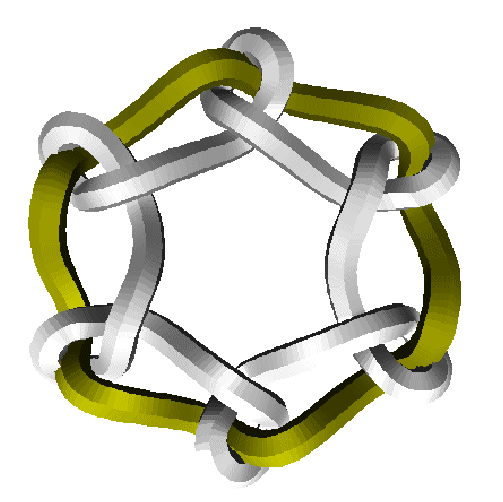
Steve Abbott’s 3D Knot Wreath
It soon became apparent we were building virtually the same designs from totally different construction techniques. Steve’s were completely mathematical, built with formulas, and as you can see, Pretzangles is built piece by piece, using the mind’s eye to recognize the 3D. We began to collaborate on the building of a program, that would combine the better of the two concepts, and this ‘Pretzangle Program’ is the result of that collaboration. It certainly has been a tug of war, at times. We both started this, looking at it from completely different points of view. What’s shown here is the result.
For example, take a look at the drawing below. It’s built by stacking Core Seed Hexagons on top of one another. It forms what appears to be a Sine Wave. The parallel lines through the middle (almost appearing as if they are ‘coaxial cables’, are one less than the stack, and the number of cycles before the colour repeats itself is one more than the stack. It took me quite awhile to build this in the conventional way, and Steve’s 3D Knot Program does it instantly.

Here is another example of the same kind
of ‘stacking’, to illustrate my theory of how the number of stacks, changes the
number of sine wave cycles:
Returning to why I left out the center out
of the Wreath Drawing above, perhaps you are now able to see the difference
between these two drawings.
This time I
won’t paint them in for you. You’re on
your own. What I’m trying to illustrate
is this: by leaving out, or putting in the center Core Seed, the entire design
completely changes instantly.
Click to see the final section of the tutorial
Click to return to the home page